Chart of Accounts
List of all Asset, Liability, Equity, Revenue, and Expense accounts included in the company’s General Ledger.

Raaj
Last Update 3 yıl önce
A company’s Chart of Accounts is a list of all Asset, Liability, Equity, Revenue, and Expense accounts included in the company’s General Ledger. The number of accounts included in the chart of accounts varies depending on the size of the company.
In Tigg, charts of accounts are structured into 5 main classes. And, each class has two primary groups. The classes and primary groups are system reserved and can not be added or altered. You can create, edit and delete a group and/or account under the primary group.
The structure of the chart of accounts can be viewed in the tree view.
Tree View
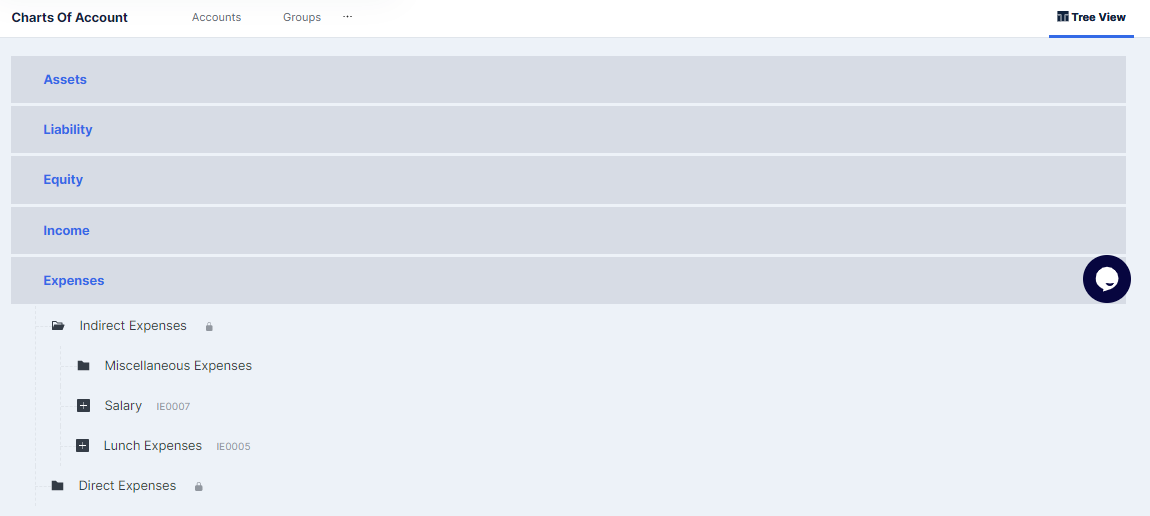
- In the Accounting Module, select Chart of Accounts.
- Click on Tree View.
- Click on Class/Primary Group/Group to expand or retract.
- Click on “Add Group” to Create new group or “Add Account” to create a new ledger account.
Note: You cannot create new “Account receivable”, “ Account Payable” or “Cash/Bank Account'' in “Chart of Accounts”. You can create a new “Account Receivable” in the “Sales” Module under “Customers”. You can create a new “Account Payable” in the “Purchase” Module under “Suppliers”. You can create a new Cash/Bank Account under “Accounting” Module under “Bank Accounts”.
Create Accounts
- In the Account Module, Select Chart of Accounts.
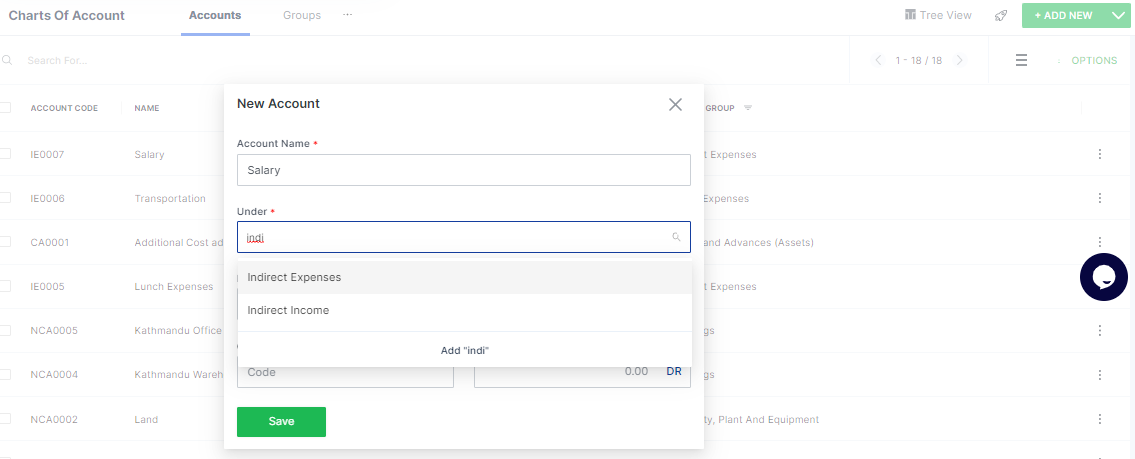
- Select on “Accounts” Tab, click on “Add New” to create single new accounts.
- Type in the account name in “Name”.
- Select the group/parent account from the drop down list in “Under” box in which the account belongs to. If the desired group is not previously created, click on “Add New” to create a new group.
- Fill in the description.
- Type in the opening balance, if applicable, select “DR” or “CR” from the dropdown list.
- Click on “Save” to finalise the account.
Note: You can create multiple accounts by clicking on “down arrow” selecting “Add Multiple Account”. Type in the account name in “Name”.Select the group from the drop down list in “Under” box in which the account belongs to. If the desired group is not previously created, click on “Add New” to create a new group. Click on “Add More” to create new accounts. However, you can not provide account description and opening balance if you create an account using multiple accounts.
Options for Charts of Accounts
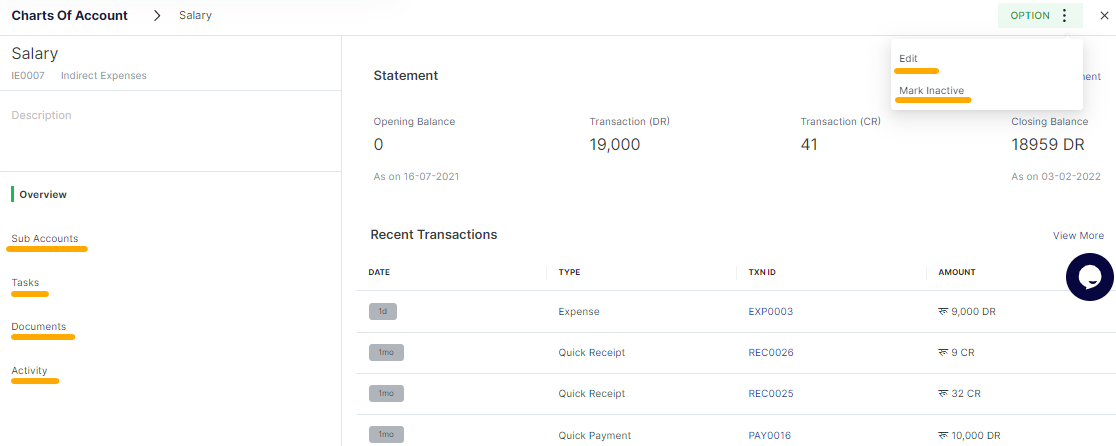
Under Accounts, you can edit or mark active/inactive for any selected account.
Add Sub Account
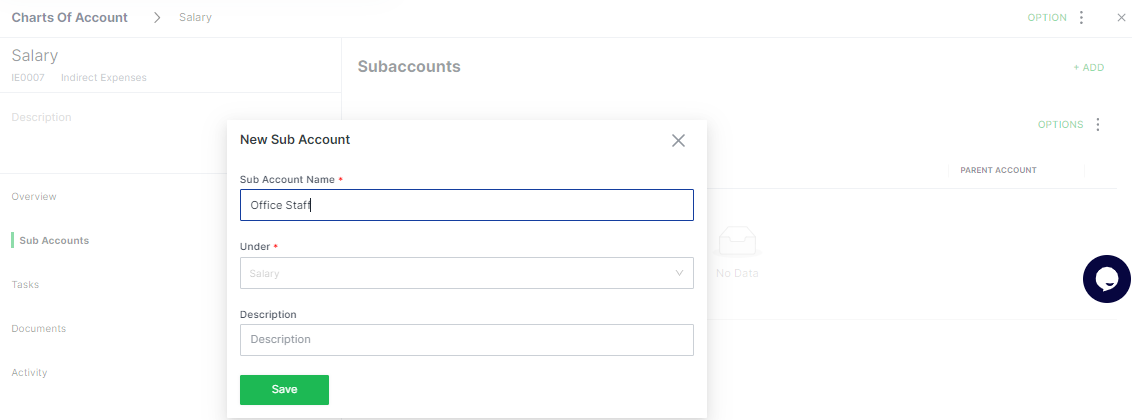
In the Account Information section for the selected account, subaccounts can be added from the “sub account” by clicking on the “Add” button.
Note: “Sub Account” can not be created under “Customer”, “Supplier” and “Cash/Bank Account”.
Create Group
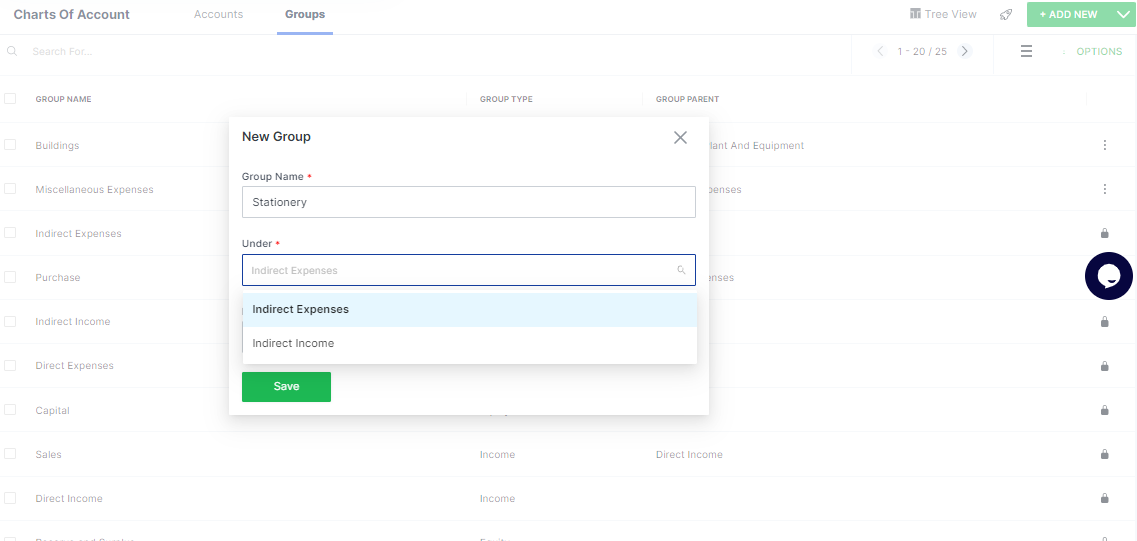
- In the Account Module, Select Chart of Accounts.
- Select on “Groups” Tab, click on “Add New” to create a single group.
- Type in the group name in “Group Name” box.
- Select the “Parent Account” from the drop down list in “Under” box in which the group belongs to.
- Fill in the description.
- Click on “Save” to finalize the account.
Note: You can create multiple groups by clicking on “down arrow” selecting “Add Multiple Account”. Type in the group name in the “Group Name” box. Select the “Parent Account” from the drop down list in the “Under” box in which the group belongs. Click on “Add More” to create new accounts. However, you can not provide a description if you create groups using multiple accounts.